Monday, January 16, 2012

Wheat Nut Bread with photos

I like trying a new recipe for bread.  
This one is wonderful and I'd only make one change. 
Be careful with how much flour you use.  The dough can get much too dry, so add your flour slowly and 
I'll explain as we go.

Wheat Nut bread

From The Complete Book Of BREADS
By Bernard Clayton, Jr.

2 (8.5 X4.5" pans)

Ingredients: 3 cups whole wheat flour
2 cups warm water (105-115 degrees F)
2 tablespoons or 2 packages of dry yeast
1 pinch of sugar
1/4 cup honey ( I used Agave syrup)
1 tablespoon salt
2.5 to 3 cups all-purpose flour
1/4 cup non-fat dry milk 
3 tablespoons of oil
1/2 cup walnuts broken
1/2 cup seedless raisins


Lightly grease your bread pans. 
In a large bowl
(I'm going to do the kneading in my mixer so I'll do all this pre-knead work
in my mixer bowl.)


Measure the whole wheat flour and make a well in the center.  Pour warm water in the well and sprinkle the yeast on top.  Stir yeast into the water with a metal whisk or fork to quicken the action.  Add the pinch of sugar and let stand for 3 minutes. 

You have not stirred in the flour you are working on top of the flour. 

with a large wooden spoon pull the flour into the yeast mixture-stir
until all of the flour is wet.
I let my kitchen aid mix this part up


Add the honey, salt and 1 cup of white all purpose flour and dry milk.
Stir in veggie oil, nuts and raisins.
  Beat until blended and smooth-about 100 strokes 
Add all-purpose flour a little at a time until the dough is 
stiff and cleans the side of the bowl.
Now is it ready for kneading.

This is where you have to be careful. 
Wheat flour can just gobble up moisture 
if you add too much flour the dough is much too dry.

I was very close to too dry on my batch
but I try to follow a recipe as is the first time
I only added 1 1/2 cups of the all purpose flour.  
I think I would have rather
cut the whole wheat flour by 1/2 cup 
and added a bit more white flour. 
Still the bread is wonderful and I think my changes
can only add to a great loaf!


Kneading:

Turn the dough out on a lightly floured board or counter top
and knead about 75 push-turn-fold-stokes. 
The dough will be stiff, bouncy but not as elastic as white dough. 
It may be slightly tacky but not sticky.  Keep flour on your fingers.

This is the beautiful kneading job the mixer did! 

Place the ball of dough in a large bowl which has been
greased with a little oil.  roll the ball around to coat it in oil 
wheat dough dries out very fast so make sure you oil it. 
Cover tightly with plastic wrap and put in a warm place 
until double in bulk. 
You can test if it has risen by poking a finger in it,
the dent will remain if risen.


Punch down the dough and knead for 30 seconds to press out the air bubbles.
  With a sharp knife divide the dough in two balls.  
Form each into a ball and let rest under a towel for 4 minutes.  

Shaping

Press ball of dough into a flat oval, roughly the length of the baking pan
Roll the oval up pinching the seam tightly as you go.
Tuck the ends under and place in the pan, seam down.
Repeat with other loaf. 


 This is where I can really see the dough is too dry to connect to it's self. 


Place the pans in a warm place, cover with wax paper and leave until 
the center of the dough has risen 1/2 inch above the level of the edge of the pan.  
This is about 45 minutes in a warm house. 


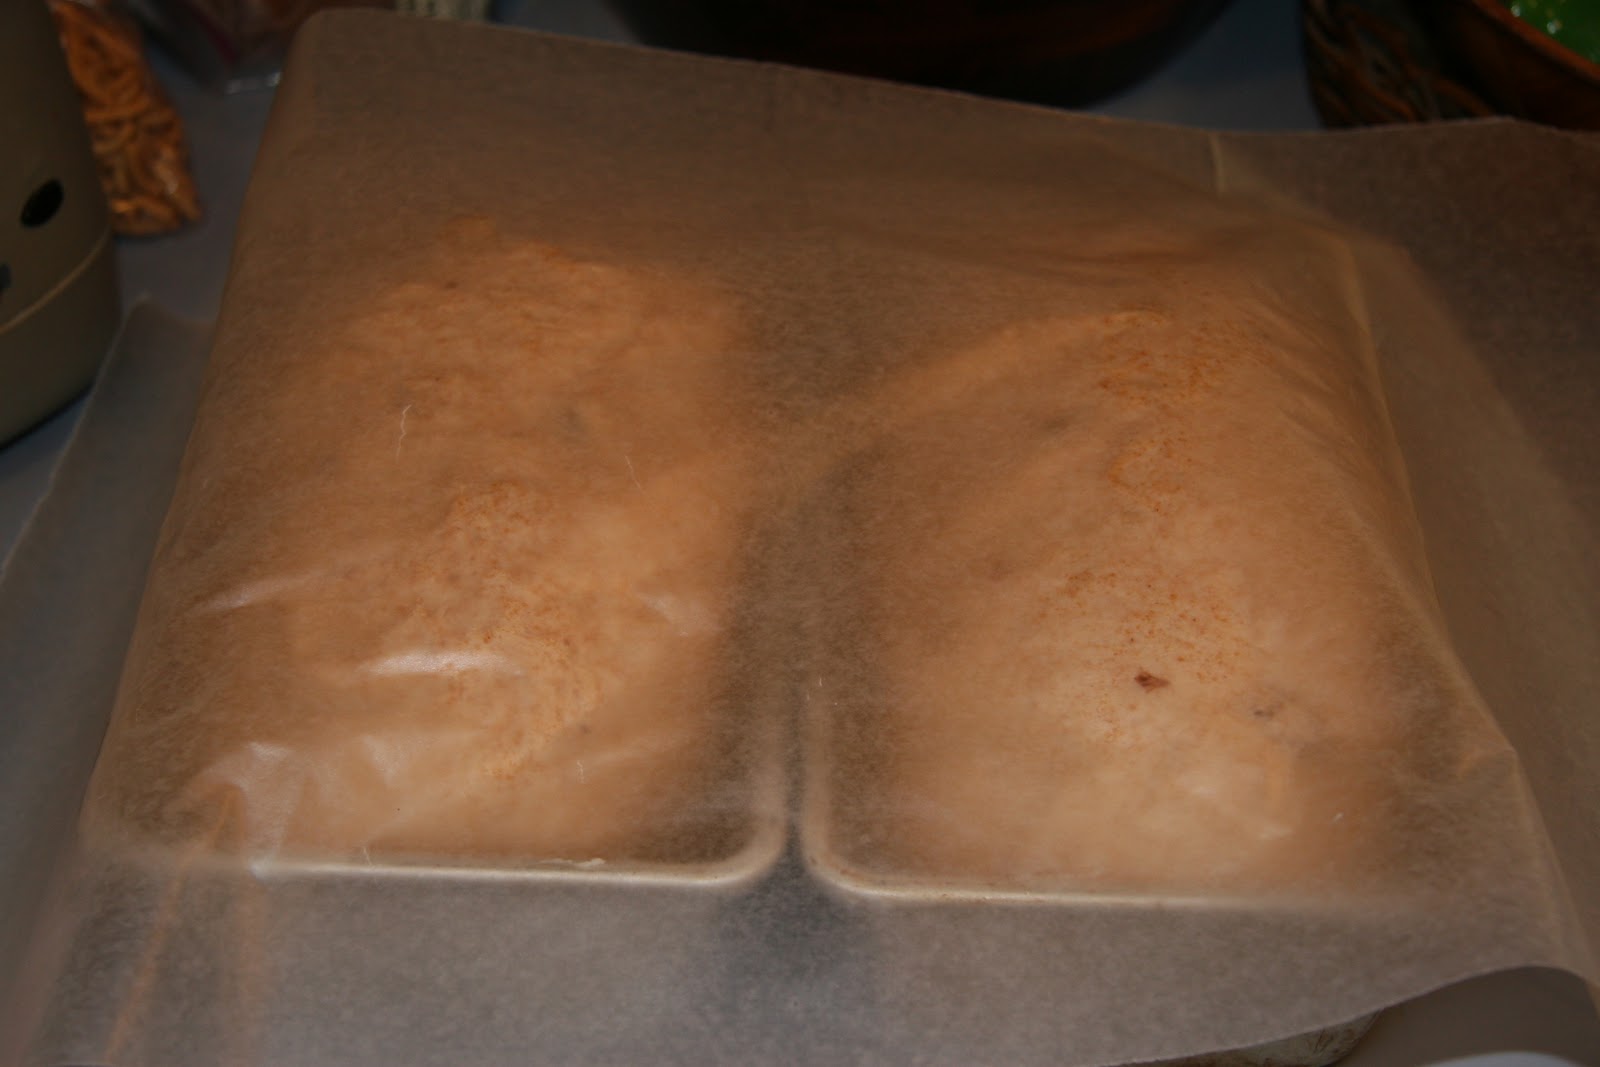
I always raise whole wheat bread nice and high!

Preheat the oven to 375 degrees F.
Bake loaves in a fully heated oven.  
When the loaves are dark brown and 
tapping the bottom of the crust yields
a hard and hollow sound they are done. 
This is about 40 minutes.  
Shift the pans twice during the baking period, starting at half the baking time)
so they can be exposed to the variations in the oven equally. 

Remove bread from the oven and place loaves on a wire cooling rack.  
I butter the loaves with a bar of butter rubbed all over the sides,
bottom, and top of the loaf.  This makes the crust nice and soft 
for the kids.  I learned this from my grandmother who made all
her bread, always, for her family of eight.  YIKES.

If you did get too much flour in your recipe count on the kids
taking the crust off because it gets very heavy and thick.


    See that hole in the right side of the bread that
was the dry dough not sticking to it's self. 

Very tasty, wonderful bread!  
You can leave out the nuts and raisins 
but they are the best part! 

If you have walnut sensitivity use sunflower seeds
They really are wonderful in bread!


Sunday, January 8, 2012

Bread recipe for sandwich bread

I know you want to start with the healthiest bread possible. 

If only you knew what they put in commercial whole wheat bread.
You would not mind the bit of white flour my recipe has to
make this good sandwich bread.

  Any wheat based product is becoming so expensive none of us can afford it.
 This is carried to the home made bread range.
You may find flour
to be as costly as buying bread.

All you can cut is the price of labor and transport, which you will do for yourself. 

Let me start you on a loaf that just tastes wonderful.
It was my go to loaf for toast
and sandwiches.
It has milk and butter, bran and honey in it.....
I know of bread recipes with none of that richness.
But try this once and convince yourself you can make good bread
before you start on the other recipes.

Honey-bran bread
from Better Than Store-Bought (1979)


1 1/2 Cups of milk (you must scald milk if using with yeast products)
1/2 Stick (4 tablespoons) butter (can be unsalted)
1/3 cup honey (honey draws moisture to bread keeping it fresh)

4 teas salt (we use so much less now)
1/2 cup warm (110 degree) water
2 teas sugar
2 tablespoon or 2 packages of dry yeast
(NOT instant yeast used in bread machines)

1 cup whole wheat flour
1 cup unprocessed coarse bran (not toasted)
4 to 4 1/2 cups unbleached all purpose flour as needed
2-3 tablespoons melter butter to brush on loaves 
(you can use oil or a cube of butter just rubbed over the hot bread,
keeps the crust from getting hard)

*************

1. In a saucepan, combine the milk and 1/2 stick butter, honey and salt.  
Stir until butter melts...Cool to 110 degrees.

2. Meanwhile in a large mixing bowl, combine the warm water with the sugar and yeast.
Let stand until very foamy...about 10 minutes.

3. Beat the cooled milk mixture with the yeast mixture,
then beat in the whole-wheat flour and bran until the mixture is
too stiff to stir by hand.
4. Sprinkle 1 to 1 1/2 cups of the remaining flour in a ring on a kneading surface.
Put the dough in the center and mix roughly with a dough scraper or pancake turner.  
Knead very thoroughly, adding more flour if needed to prevent stickiness.
This should be a medium-stiff dough.
Knead it until dough is elastic and has a slight sheen.
Never worry about over kneading the dough, most the time people under knead it.  
It should bounce away from your finger when you press on the dough.

5. Form into a ball and place in a large, oiled bowl.
Turn the dough to coat with the oil
and allow it to sit and rise until doubled in volume, about 1 hour. 
I lay a bit of wax paper over the top to keep it from drying.

6. Punch dough down and turn it onto a surface to knead out the air.  You don't need
more flour and this isn't a heavy kneading just a bit of punching out the air.

Half the dough and let it rest on the counter for 10 minutes.  
Put that wax paper or a cotton towel over the two loafs.

7. Form each ball of dough into a loaf. 
For a sandwich loaf, 
roll dough into a 1/2" thick rectangle about as wide as the pan. 
Beginning on the short side, roll up the
dough Jelly-roll fashion.
pinching the rolled portion to the flat portion every half turn or so.
  Pinch the ends closed and fit
snugly into a greased 9 X 5 inch loaf pan.
Shaping it higher in the center than at the sides and ends. 
 This goes fast.

Let dough rise again until doubled; it should rise
about 1 inch about the pan rim.

8. While the loaves are rising, preheat your oven to 425 degrees.

Bake them in the center of the oven for 15 minutes. 

REDUCE the oven to 350 degrees 
and bake the loaves for about 20 minutes longer. 
The loaves will have shrunken away from the sides of the pan.

Turn out the loaves from the pan and bake them for 5 more minutes or
until a firm rapping on the bottom produces a hollow sound.

Remove from oven, rub with butter and cool.

Unless you just have to have a hot slice which is not easy to slice but do enjoy!
Makes 2 loaves.


If you have a mixer with a dough hook you are really in business
It will knead your dough so much faster than you can.  
If you press your hands into the dough ball after the machine kneads
it you will get an idea of what you will it will feel like
when hand kneading. 

No photos tonight I put this recipe here to let you see what ingredients 
you will need.  Tues I will make a couple of loaves and take photos. 


Friday, January 21, 2011

mind mapping to open up the possibilities


I love to mind map but every time I tell someone, who is stalled in their progress of life, to make one they look oddly at me.  Can it be that after being around for so long no one knows about mind mapping?  

Well in honor of my sisters birthday and because she asked me so nicely to show her how this works here is a posting on mind mapping. 

 This is the mind map a friend sent me to teach me how it works, I have her to thank for my skill in mind mapping

Why do you want to mind map?  School, work, etc has trained your mind that you can only do things left to right and top to bottom.  We are well trained and we can usually pop off a list of "To dos" very easily.  BUT what if you are an over worked employee, a tired mom or a grammie who's done so much you are in a rut? How can you look past the layers of trained thought? How do you discover new ideas?

Here are some of the stated rules to mind mapping. Mind maps morph into other forms very easily but try honoring this little list of rules. It will open your mind to things you didn't know you desired.

1. USE COLOR & thick and thin lines
2. USE key words and upper and lower case letters
3. Each word or image should sit on it's own colorful line
4. Make the lines only as long as the key word
5. Color code similar items (can be done as you go or after you are done)
6. use radial hierarchy, bubbles, outlines to create branches

We call these maps broccoli clusters because the first one we did was
a giant green one on how to improve our yard.  

What this does is allow your mind to freely think and not just list things. It also helps improve memory of your plan.  Write any direction you want, don't bother to be neat.  My most surprising thoughts come when I'm the messiest.  When you are finished you can redraw a tidy, colorful mind map removing what doesn't serve your goals. The real surprise is what your inter-mind will tell you about what you need.


Hay sis this is the mind map you and I made one night together for our histories.

I was working through an e-book my son gave me on mind mapping some years back.  It was fun and the first project was to mind map your last 5 years of life.  Yes if you were going to die in 5 years and you knew it what would your mind map look like?  I had a good chuckle and began the project.  I began to feel more and more serious.  There were truly some things I didn't know would bother me if left undone. 
The finished mind map only had nine things on it but WOW what a surprise so much of it was.  Now it looks like I will take bleach boy to the grand canyon for our 40th anniversary because that was one of those surprises in my last five years! 

So grab a piece of paper, keep the thinking on this simple.  It's not hard to do.  Grab some colors and make yourself a mind map that says "2011 how will it look" After you make a couple of maps you will be an expert it's just that easy.


You will notice some of my maps don't have color on them, but do use color as you work.  I am an artist and my mind retains so easily, color becomes a toy to me, I end up turning it into an art project too often.  USE COLOR.

As you can see by the mind map right above there are two centers that formed because my mind found another path that seemed more important.  Feel free to do this. You can make two tidy finished mind maps from such a project to save for using. The goal is free thinking not tidy list.


How do I use my maps?
  I post them on doors, walls or where ever I can be reminded of the plan.  The maps hang until I have colored in enough of the circles (I like to color in finished projects) then I  put them in a file to save them.  

So the goal now is to figure out your categories for 2011 goals and then find out what those goals will be. 

Next: how to keep this simple and get busy! 


Monday, January 17, 2011

searching my mind, remembering past successes


I thrive on being very organized.
  In younger days it was all in my head but around my third child I had to start moving things to paper.  I know starting on a new track will include some organization skills I remember and enjoyed.  So I have been writing down ideas and looks for categories.  Right before bed it just appeared so easily. 

Creating balance in my life will do me a world of good. 
So I made some categories that goals will be gathered under.  I will love finishing a goal and crossing it off. If I keep my goals in my comfort zone I gain nothing new. By making these categories I will keep a balance of goals.

Here they are:

FAMILY
HOME
COMMUNITY
KNOWLEDGE
SPIRITUAL
TALENTS
SELF RELIANCE
HEALTH and WELL BEING
CONNECTION TO THE PAST
FUN

I found a template in my word program that will work just fine for making a page for each category.  It has been fun filling out all the goals for each grouping.

Next I'll calendar a way to balance my year with these goals.

Some examples of goals I choose, so far, is to work on my personal history with both my husband and my sister.  This has long been neglected.

On Self Reliance we bought two palettes of cardboard boxes that fold into can storage that rotates.  I have a goal to get the shelves cleared and the boxes filled with cans of food.

I forget to have fun so I don't have anything listed in the goals.  Anyone have some ideas?  Every grouping has a goals list now except "Fun".  In the Photo above ms Fun she isn't holding onto the other balancing categories...what to do?  Would having a game night with our neighbors cover goals in both Community and Fun?

Home covers inside and outside, it includes replacing the guest bed blankets, replacing floors and making menus for simple food that I can live with.

Talents is way too full of goals, I play the piano, the guitar, harmonica and I sing and it has long been left unattended, these talents.  I also was a commercial art major and I'd like to regain that talent.  Then there's knitting, weaving etc.

The list goes on...and on.... I'm hoping you see where this is going.  If you are single or in a different situation than myself you will need different categories.  But everyone has a home that needs their attention and everyone has talents and we all should be self reliant and involved in our community, etc.

If you need to come up with goals I suggest making a mind map.  There are many good web sites on how to free up your thinking and mind mapping is my favorite.  Once you make a mind map of goals for 2011 you may find that they aren't at all what you thought they would be.

Things are looking up up up!

Sunday, January 16, 2011

Getting back on track!


I've been just chugging along, trying to stay on track and suddenly I look back.
When you are raising a family or seeking a job goal or life goal you can get 
ONE TRACKED Going around and around.

Does it get me where I am going?  Sometimes and maybe only once.  
I raised five children and took every focus I had to do it.  Once the kids were in their teens I became so busy and so full of thoughtful watching that I lost something of myself and got going on a track that went round and round. 

I love the new year, I love celebration and I love things that pace life.  Nothing pleases me like a new calendar, a new goal, and new plans. 
This year will not be like many of the others. This year I am getting off my track. 


I just spent a couple of weeks helping with my some of my grandchildren and it brought many thoughts up and I am planning some great new goals and adding in
some old ideas I loved. 

Join me as I restructure my life as seasoned mother and turn it into another phase with exciting new goals and ideas. I intend to keep it simple as life now is ever so complex and I have very little time of my own now. 

Next post where do I start?


Friday, December 24, 2010


This is a beautiful song about what to give..............

Hope as you prepare for your Christmas you have joy in your heart and love for others.


  Here is the choir as they sing very lovely